HAND FEEDING: IMPLEMENTS, METHOD & TECHNIQUE
Preparation for Hand Feeding
by Wanda Barras
Preparing for your first hand-feeding undertaking is a time filled with choices. Selecting a brooder, a hand-feeding formula, feeding utensils, brooder bedding, disinfectants, a gram scale, etc. Nowadays a variety of useful hand-feeding equipment is readily available to aviculturists. An important part of the hand-feeding experience is choosing safe, and appropriate hand Feeding implements and the method an technique to utilize these implements. Hand- feeding implements can either be purchased or even handmade from household items.
Syringes, tubes, pipettes and spoons are some of the most common feeding tools used by aviculturists. Some hand-feeders are known to use turkey basters, squeeze bottles, tiny paintbrushes and even paper or Styrofoam cups, bent to form a spout.
Whether you favor pipettes, pre-bent spoons, syringes or feed tubes it is strictly a personal decision. The important thing is to select hand feeding implements and techniques that are most comfortable to you and appropriate to the size and species of chicks you will be hand rearing. Anyone who hand-feeds has a preferred feeding method and technique. What works for one may not work for another? Experiment with different methods and tools. Listen to and learn from experienced hand-feeders.
.....become familiar with the general location of a bird’s major internal organs and physiology.
Have on hand an accurate diagram of avian anatomy and become familiar with the general location of a bird’s major internal organs and physiology. Read about the various hand-feeding procedures and become familiar with the tools available. You are not limited to one method or tool. Circumstance may dictate an alternate choice of appliance or technique. Your hand-feeding kit should contain a variety of utensils.
The feeding apparatus and procedure chosen should be appropriate to the chick’s condition, age, size and species. A feeding tool as small as an eyedropper or as large as a 100cc syringe may be your feeding device of choice. A small artist’s paintbrush or 0.5 cc syringe can be handy for feeding newly hatched canary or finch chicks, while a 10cc syringe with 6” of latex tubing is ideal for feeding young, 3-week-old cockatiels. Bent spoons work well when hand-feeding Lories, who feed naturally by lapping up their food. Neonates or ill chicks with little or no feeding response may require tube or “gavage’ feeding. The circumstances and choices are endless. Find what works best for you and the babies you are feeding.
Call: 1-800-555-1234
Call: 1-337-394-6683


 | ||||||
Illustrations:

You are invited to utilize the resources and links to informational sites and forums.

 | ||||||
Visit our Web Store for All Your Avian Hand-Feeding & Breeder Supplies. .
PERSONAL FAVORITE
My feeding utensil of choice is the syringe, which is available in various sizes ranging from 0.5cc to 100cc. There iseven a 12cc curved-tip syringe on the market. Medical syringes are easy to use, fast, accurate and sanitary. A known volume of food may be administered effectively and efficiently. Syringe sizes should increase as birds grow. Large-tipped ‘catheter’ syringes (available in sizes of 12cc, 35cc, 60cc and 100cc capacities) are useful for feeding older chicks of the larger species such as Grays, Amazons, Cockatoos and Macaws. Cather tip syringes make it possible to feed a thick formula more efficiently. The new o-ring and AT style of syringes available are long-lasting and easily disinfected.
These sturdy syringes are safe, economical and easier to use than the old fashioned Monoject syringes. Some hand-feeders use syringes to shoot food into the crop of babies. The tip of the syringe is placed on the left side of the bird’s mouth, when a feeding response is initiated; the food is quickly shot toward the back of the head. For experienced feeders, this procedure proves to be relatively safe, but does require some practice. Ideally, the feeding tools should be changed or disinfected between feeding each baby. Realistically, change or disinfect when moving between babies from different clutches or to those, which are not being reared in the same brooder.
FROM DAY ONE
Syringes can also be used to slowly dribble formula into the mouth of a bird with successful results. I prefer this method for feeding babies under 1 week, especially those under 3 days. For day ones, I use a tiny 1cc or 1ml or 0.5 syringe. I feed from 0.2 cc to 0.6cc’s for the first feeding depending on the size and species of the neonate. The syringe is held in the feeder’s right hand while gently supporting the baby’s head with the left hand. The baby faces the hand-feeder; a left-handed feeder faces the baby away from him. These tiny syringes allow you to feed very small amounts safely without drowning/aspirating newborns.
TECHNIQUE
Gently support the neonate and place the tip of the tiny syringe on the corner of the left side of the baby’s beak. Touching the commissars, soft portion on the edges of the beak, of a healthy chick will initiate a feeding response. While using slight pressure on the syringe, dribble tiny amounts of warm, very liquid formula into the chick’s beak as he bobs his head. Day one hatchlings should be fed small amounts often round the clock for the first two days. If you place your brooder within hearing range the chick will alert you when he is hungry.
TUBE FEEDING
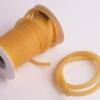
After a few days, I begin to add soft latex tubing of appropriate size to the end of progressively larger syringes as the baby grows. I prefer the gavage method, because I find it practical, extremely safe, time saving and a more natural method of feeding.
NEVER force a feeding tube or feeding needle. The
apparatus should glide easily into the crop.
Extreme caution should be practiced whenever using a stainless steel feeding needle. Gavage needles should be utilized with discretion. Needles are recommended for administering medications and nutrients to ill birds, especially mature parrots. As the pumping (feeding) movements of Neonates, under 1-week-old are less violent, they can be fed successfully using a feeding needle. I suggest using soft latex tubing as the better choice for basic hand-feeding.
TUBE FEEDING EASY TO LEARN, BUT TAKE CARE!
Gavage or tube feeding is a relatively easy technique to perfect. The procedure is very simple and is readily learned if demonstrated by an experienced breeder or veterinarian. Gavage feeding can be a dangerous procedure if used improperly, but when mastered the technique is not difficult to perform.
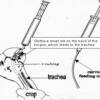
flexible latex tubing of approximately 6” or so in length (commercially available in various sizes: tiny Parakeet, Cockatiel, Amazon and Macaw) attached to the end of a syringe enables the precise feeding of a known volume over the glottis (slit at the rear of the tongue) and directly into the crop, thus by passing the opening (glottis) to the trachea. Air enters the lungs through the glottis, a small slit to the back center of a birds tongue. In larger species such as macaws the glottis is easily seen. Tubing attached to the syringe should be long enough to reach from the bottom of the crop, to about ½” outside the mouth
Three things to keep in mind when gavage feeding are:
1) Due to the esophagus’ ability to stretch, always choose the larger feeding tube over the smaller. There is less 

 chance of entering the trachea, (windpipe) through the glottis, when using a larger tube. It may be necessary to

 increase tube size with age.
2) The wall of the esophagus and crop is extremely thin and subject to puncture. never force a feeding tube or feeding needle. The feeding apparatus should slide easily into the crop.
3) The curve in the bend of the neck is easily punctured. Gently tilt baby’s head up while rotating soft tubing down the esophagus. never force! Crops should be gently filled to a plump, but not tight stage. It is better to feed a little less than too much. Don’'t overfill crop so contents rise up into the neck. This rule applies to any method of feeding.
BULBS AND PIPETTES
Bulb syringes are another feeding utensil commonly used for hand-feeding large-species babies. This specialty syringe consists of a large rubber bulb, similar to a turkey baster, which fits onto a wide syringe body. The bulb acts as a plunger, which sucks formula up and expels it out when pressure is applied. The usual size is a 60cc capacity. When utilizing the bulb as a storage reservoir, the 60cc size bulb syringe is able to hold up to 140cc’s of formula. This size is handy for feeding hungry Macaw babies. The shooting technique described earlier is most often used. The tip of the syringe is placed on the left side of the bird’s mouth. When a feeding response is initiated, the food is squirted or shot into the right side of the birds mouth, toward the back of the head, down the esophagus, into the crop. I prefer a less violent method of feeding. However, many successful breeders use this method.
Plastic pipettes, available in various sizes are used by a large number of breeders. Pipettes hold only a few cc’s or ml’s of formula and require repeated fillings to feed large babies. The largest pipette capacity is approximately 7ml to 10ml. Pipettes work similarly to a bulb syringe and can be used to dribble or shoot formula into the baby’s beak. Formula is sucked up, and then expelled by pinching the small bulb end. This a 1 cc pipette can be especially handy when feeding tiny babies. Because they are difficult to disinfect, pipettes should be purchased in large quantities and disposed of after each use.
Spoon-feeding is the method most chosen by beginners because it is user-friendly. Almost anyone can get the hang of spoon-feeding. Spoon-feeding is very slow, but is more personal and is closest to a bird’s natural method of feeding. This method is slower and less efficient, especially if feeding numerous chicks. However, this is a good choice for someone feeding one or just a few babies. The normal procedure is to use a spoon with edges bent inward to hold formula; Initiate a feeding response while supporting the baby and its head; than, dribble formula into the beak one spoonful at a time, until the baby is satisfied. The baby’s feeding movements will pump the spoon and keep food moving toward the tip. This technique can prove to be messy, but it does seem to simulate the natural feeding of parent birds.
SPOON-FED ARE GENTLER BIRDS?
NOT REALLY!
Through my 25 years of hand feeding, using different hand-feeding methods and observing other hand-feeders, I have not noticed any behavioral differences associated with hand-feeding method or technique. Gavage babies are just as gentle and wean just as quickly as spoon-fed. What makes the difference is the time spent socializing and touching babies. Remember, a feeding instrument is only a tool to be used to get nutrition into a chick. A baby’s emotional, physical and psychological needs must also be met. No tool or technique is the absolute best. What suits one person or one species may not be the best for another. Different species may require different feeding methods or utensils. Be flexible and open-minded, but do not change a successful feeding routine on a whim. If you must experiment, do so wisely and judiciously.
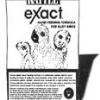
I have successfully developed and used my own hand-feeding formula in the past to hand rear chicks. These days with all the good commercial formulas to choose from I elect to use a commercial formula instead of my own. It is not that my own formula didn't produce healthy chicks, it is just less hassle to use a ready made hand rearing formula. My commercial hand feeding formula of choice is KayTee Exact. I find Exact easy to use and find it is nutritionally sound for most species being hand fed. I especially recommend Exact for those feeding cockatiels, lovebirds and Quakers. There is also an Exact Macaw formula available. Zupreem and Pretty Bird hand-feeding formula have also been used here successfully. I DO NOT recommend novices putting together and making their own homemade hand rearing formula. Bacterial contamination in homemade formula is always a possibility. Commercial, ready-to-use formulas are much safer to use then kitchen formulas. They are nutritionally balanced and uncontaminated (if up to date and handled properly). Most ready-made, commercial formulas are easy to use and when used as directed will produce healthy chicks. It is essential that you read and follow the instructions provided with ready-made formulas. Understanding and properly following the directions can mean the difference between success and failure."
Always discard unused formula. Never, ever use a microwave to heat formula. Always use a thermometer to check temperature (103°F to 105°F never more than 110°F or less than 103°F). It is best to use sterile water, hot filtered tap water or hot bottled water. Do not add fatty substances (oils, peanut butter, etc.) to commercial hand-feeding formulas unless recommended by an experienced breeder or an avian veterinarian. Choose a species specific formula instead. These diets are complete for most species and the addition of supplements may cause fatal problems such as fatty liver disease.
WEIGH CHICKS DAILY
Although not absolutely necessary, weight data is helpful to monitor the chicks’ progress. A healthy chick should gain weight every single day until he approaches weaning. That is 15% each day for the first 10 to 14+ days, then at least 10% daily. To determine percentage weight gained, weigh the chick, with an empty crop, and record his weight. On the next day at approximately the same time and on an empty crop weigh him again. Take the difference and divide by the previous days weight in order to get a percentage. For example: if the chick weighs 20 grams on a given day and is weighed the next morning gains 3 grams weighing 23 grams. Divide the 3 by 20 which will total .15 or 15%.
To accurately check a chick’s weight he should be weighed daily, using a good quality gram scale. Weigh at the same time every morning, on a empty crop. Keep accurate records of weights and observations. This data may be helpful in future studies. Growth and development can be assessed visually. If you are an inexperienced hand-feeder this can be tricky. In time, you will be able to sense if if something is just not right with a baby. Until you acquire this 'gift' it is better to purchase a good gram scale and compare your data to established weight charts. Monitoring weight gain and loss is the best way to identify a problem before it becomes visually obvious.
Customarily, at about 3 to 4 days into the first week I convert from syringe feeding to tube feeding. I use small gauge latex tubing. This method, if performed properly,is safe and most efficient. If you are more comfortable using a syringe or pipettes continue to do so—this is a personal choice. The size of the feeding implement should change as formula thickens and the chick grows. At two weeks, a formula ratio of about 1 part dry formula to 2 parts warm water seems to work best. Formula should be the consistency of a yogurt or applesauce. While this ratio of solids to liquids are best for babies 7 days to up to two weeks, in older chicks the solids to liquid ratio should be higher, to almost a 1/1 ratio. Formula ratio’s may vary with brand
WATER IS AN IMPORTANT NUTRIENT
Water is an important nutrient to the growing chick. In order to avoid dehydration the formulation of a diet for parrot chicks must take the ratio of solids to liquids in a formula into consideration. A basic rule of thumb is that chicks need about 160-200 ml of water per kilogram of body weight to provide basic body maintenance functions. The water requirements of a healthy chick are about 0.16 to 0.2ml per gram of body weight. Thus, a 75-gram chick would require approximately 13.5 ml, (2.5 teaspoons) per day. During illness, if a bird is hot, is regurgitating or has diarrhea, water requirements maybe 3 to 5 times the usual amount. The feeder must make formulation adjustments according to the hydration condition of the chick.
To determine the percentage of solids to liquid in your formula you must weigh the dry and liquid formula: First, place a container on a gram scale. Use the tare function to get a zero reading. Second, place your usual amount of dry formula in the container and make note of this weight. Third, add water and mix as usual. Fourth, weigh the finished mixture. Fifth, divide the total weight of food plus water, into the weight of the dry food. This will give you a decimal number. This is the percentage of solid food matter in your formula. The percentage of solids recommended for a 7 day to 2-to 2 ½ week old chick is between .26 and .30 which would be 26% and 30%. Percentage of solids for older chicks should be higher.
.
OVER-FEEDING CAN CAUSE PROBLEMS
Do not overfeed, as this may result in crop overfill, regurgitation and possible aspiration, which can cause medical problems or death. Adjust feeding utensils and methods accordingly.. This precaution can possibly prevent the spread of disease.
After the first critical week the baby’s crop will be able to hold enough food to sustain him for several hours. At two weeks he should be fed about four to five times a day. At Three weeks, three to four times a day. (These are approximates, amount may vary with different species.) Allowing the crop to become completely empty between feedings is recommended, but not absolutely necessary. This prevents old formula from remaining in the crop for extended periods, which could breed bacteria and fungus-based medical problems.
Below are the approximate crop capacity ranges for some popular species. These numbers are not to be interpreted as the rule. Remember all babies are individuals and proper adjustments should be made. These figures are valid for babies over two weeks old.
There is a great deal of individuality among birds—even between clutch mates. Consequently, what works for one breeder may not be successful for another. The ultimate success in hand rearing lies in following basic hand-feeding practices with determination, dedication and a willingness to learn. Experience comes with time and hard work.
The End
The helpful Artficle above, which is made available to you on line. The following articles including the article above is in Wanda's "A Common Sense Approach to Handfeeding". Available in the "Books & Video's" section of our Cage'N Bird Web Store.
INTRODUCTION TO HAND-FEEDING ---Hand-feeding basics for the beginner
DAY-ONE HAND-FEEDING ---Day-one Hand-feeding basics.
DEALING WITH CROP PROBLEMS: PART 1 ---Diagnosis & treatment.
CROP PROBLEMS, CANDIDA: PART 2--- Identification and treatment.
GUIDE TO GAVAGE FEEDING AND CROP EVACUATION---Lifesaving technique
UNDERSTANDING THE WEANING PROCESS ---What to expect and how to cope
SPLAYED LEG ---Orthopedic condition that can be corrected if identified early
KEYS TO SUCCESSFUL HAND-FEEDING---Identification, Diagnosis & Treatment
PROBIOTICS ---Probiotic therapy can help in the prevention of disease in aviary & nursery
HAND FEEDING TIPS AND HINTS---Useful Tips for hand-feeders
VINEGAR --- A natural disinfectant..
GSE ---Grapefruit Seed Extract its uses in the aviary and avian nursery
WHAT IS DE? ---Diatomaceous Earth, approved food additive, pesticide & natural wormer
THOUGHTS ON WEANING & DIET ---What foods are appropriate for weaning.
HAND-FEEDING FINCHES ---How to hand-feed tiny finches.
STAGES OF AVIAN DEVELOPMENT ---Development from hatch to weaning
Sanitation? Antiseptic? Disinfection? Sterilization? ---Understanding cleaning and disinfection products.
BACTERIA IN THE NURSERY ---Learn about good and bad bacteria & disease prevention.
THE BUSINESS OF HAND FEEDING ---Hand feeding for out. What should I charge
Belle Ècorce Farms'
Cage'N Bird---ARTICLES on Avian Hand Feeding & Husbandry
TROUBLESHOOTING POOR WEIGHT GAIN
If problems are noted, consider:


